
Shrink Paper
Esta técnica é muito fácil e muito divertida. Tudo o que você precisa:
– Shrink Paper
– Canetinhas permanentes
– Uma ferramenta que faz furinhos
– Forno
This technique is very easy fun. All you need here:
– Shrink Paper
– Permanent markers
– A tool to make holes
– Oven

Desenhe na parte áspera do papel
Draw on the rough part of the paper
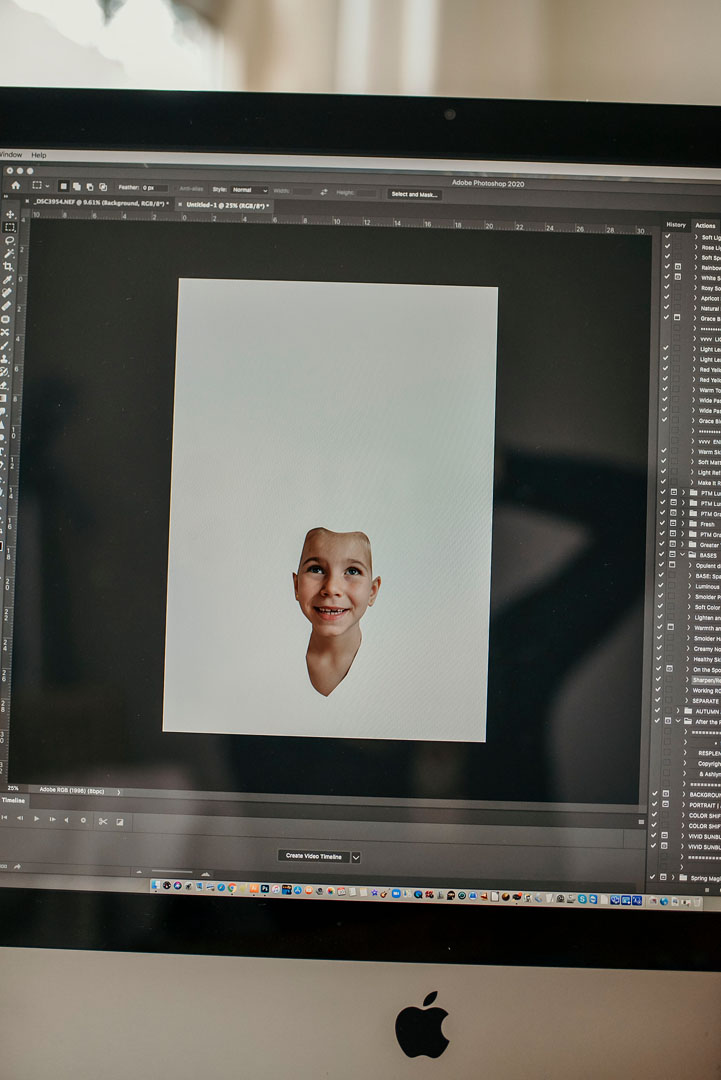
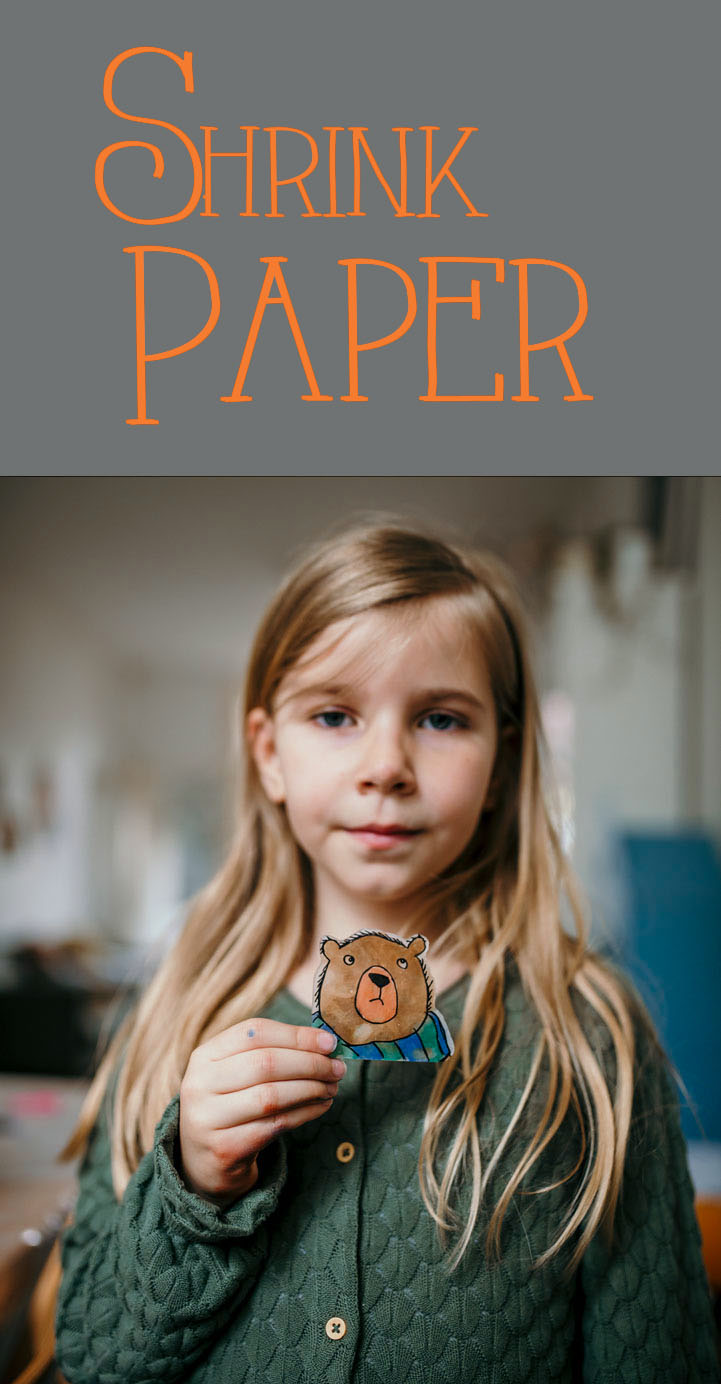
Aqui eu imprimi na Inkjet e desenhei o cabelo da minha filha. Não achei que a técnica deu muito certo. A impressão ficou bastante clara e sem muita definição. Mas valeu a tentativa.
Tenha cuidado ao cortar o Shrink Paper pois ele pode ser bem quebradiço, depende do ângulo usado.
Here I printed my daughter’s face and drew her hair after. I don’t think the technique worked very well. The print was very light and doesn’t have much definition. But it was worth the try.
Be careful when cutting Shrink Paper as it can be very brittle, depending on the angle used.


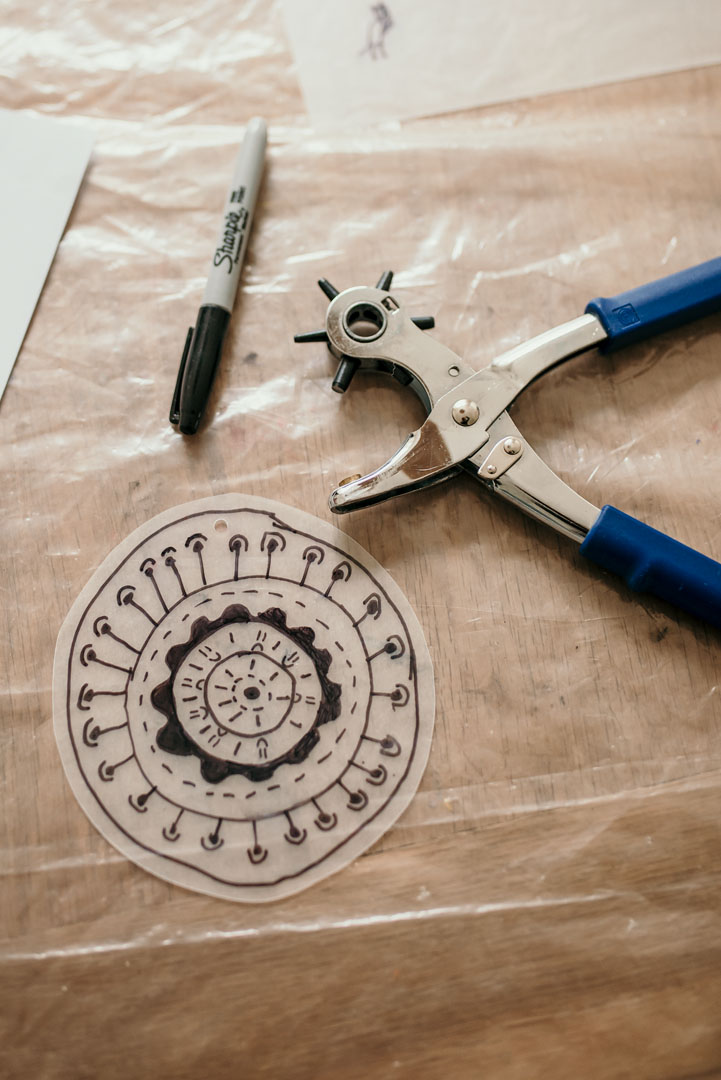
Faça um buraco antes de colocar no forno caso queira que seu projeto vire um chaveiro ou um colar. O ‘papel’ virará um plástico grosso e depois será muito difícil fazer o buraco, portanto esta é a hora.
Make a hole before putting it in the oven if you want your project to become a key chain or necklace. The ‘paper’ will become a thick plastic and then it will be very difficult to make the hole, so do it now.

Aqueça o forno 150 Celsius. Coloque o papel com a parte áspera para cima. Feche o forno e veja o papel se contorcer inteiro.Quando ele voltar ao normal e ficar esticado novamente, está pronto.
Heat the oven to 300 Fahrenheit. Load the paper with the rough side up. Close the oven and watch the paper squirm all over. When it returns to normal and stretches again, it is ready.


Para ver vídeos do Shrink Paper, acesse o meu Instagram, andreakjanes, e veja nos highlights. :)
To see videos from Shrink Paper, access my Instagram, andreakjanes, and find it in the highlights! :)

Leave a comment