Natural Light Family Photographer, now in Geneva.

Archive for ‘May, 2020’

A gente vem trazendo a natureza para casa, principalmente depois que minha filha nasceu. Algumas dessas coisas vão parar nos bolsos dos casacos, no filtro da máquina de lavar e assim por diante. Acontece que algumas dessas coisas que as crianças pegam na rua, acabam ficando. Vão parar em quadros, em crafts e até em vasos. Recentemente foi este pedaço de madeira com formato de estilingue. Eu trouxe então a técnica do tear para este galho e ele ganhou um espaço na parede acima do sofá.

We have been bringing nature home, especially after my daughter was born. Some of these things end up in the jacket pockets, the washing machine filter, and so on. It turns out that some of those things that children pick up on the street, end up staying. They will be on the walls, some kids crafts and even vases. We found recently this sling-shaped piece of wood. I then brought the weaving loom technique to this branch and it gained space on the wall above the sofa. We love it!

weaving, weaving branch, branch weaving, nature weaving, tear, DIY

1 Comment

Estes barcos a vela que fizemos são lindos e eles realmente flutuam na água!
Basta arranjar um pedaço de madeira e um palito de pau, longo o bastante para colar ou costurar uns pedaços de pano. Eu usei tachinhas para mural e assim amarrei as cordas. Quanto mais rústicos, mais bonitos, então, esuece a perfeição! ;)

These sailing boats are so beautiful and they really float!
Just get a piece of wood and a long enough wooden stick, glue or sew a few pieces of cloth. I used studs for murals and so I tied the strings. The more rustic, the more beautiful, then, forget perfection! ;)


crafts, sailboat, sailing boat craft, driftwood sailboat, barco a vela DIY, Barco a vela criação,

Leave a comment


Esta técnica é muito fácil e muito divertida. Tudo o que você precisa:
– Shrink Paper
– Canetinhas permanentes
– Uma ferramenta que faz furinhos
– Forno

This technique is very easy fun. All you need here:
– Shrink Paper
– Permanent markers
– A tool to make holes
– Oven


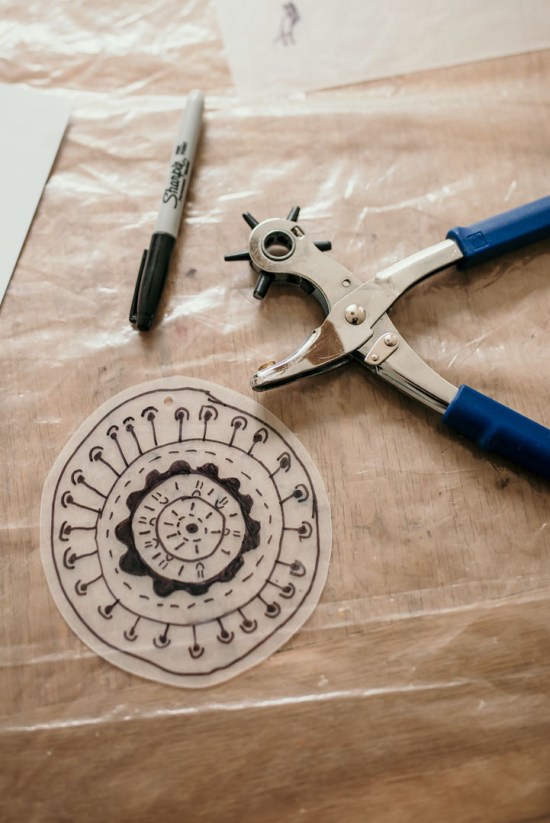
Desenhe na parte áspera do papel

Draw on the rough part of the paper


Aqui eu imprimi na Inkjet e desenhei o cabelo da minha filha. Não achei que a técnica deu muito certo. A impressão ficou bastante clara e sem muita definição. Mas valeu a tentativa.
Tenha cuidado ao cortar o Shrink Paper pois ele pode ser bem quebradiço, depende do ângulo usado.

Here I printed my daughter’s face and drew her hair after. I don’t think the technique worked very well. The print was very light and doesn’t have much definition. But it was worth the try.
Be careful when cutting Shrink Paper as it can be very brittle, depending on the angle used.


Faça um buraco antes de colocar no forno caso queira que seu projeto vire um chaveiro ou um colar. O ‘papel’ virará um plástico grosso e depois será muito difícil fazer o buraco, portanto esta é a hora.

Make a hole before putting it in the oven if you want your project to become a key chain or necklace. The ‘paper’ will become a thick plastic and then it will be very difficult to make the hole, so do it now.


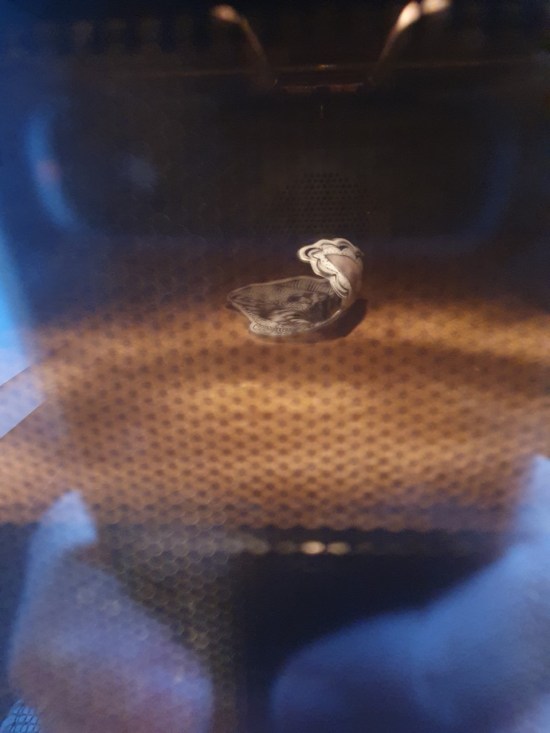
Aqueça o forno 150 Celsius. Coloque o papel com a parte áspera para cima. Feche o forno e veja o papel se contorcer inteiro.Quando ele voltar ao normal e ficar esticado novamente, está pronto.

Heat the oven to 300 Fahrenheit. Load the paper with the rough side up. Close the oven and watch the paper squirm all over. When it returns to normal and stretches again, it is ready.


Para ver vídeos do Shrink Paper, acesse o meu Instagram, andreakjanes, e veja nos highlights. :)

To see videos from Shrink Paper, access my Instagram, andreakjanes, and find it in the highlights! :)

Leave a comment