Natural Light Family Photographer, now in Geneva.

Posts by Andrea Janes Photography

We found some projects to make during the quarantine that will probably be an idea for you and your kids.

Encontramos alguns projetos a serem feitos durante a quarentena que provavelmente serão uma idéia para você e seus filhos.

Everything you will need is a box of cereal, white glue and markers.

Tudo o que você precisa é de uma caixa de cereal, cola branca e marcadores ou canetinhas.

The cereal boxes are perfect because they are thin and easy to cut out, and also they have a beautiful craft looking paper on the inside part of the box. It’s perfect to draw and paint!

As caixas de cereal são perfeitas porque são finas e fáceis de cortar, e também têm um belo aspecto de papel artesanal na parte interna da caixa. É perfeita para desenhar e pintar!

I used a Chalk Marker for this project because I love the look of white with craft paper, but you can use any marker you have at home. Creativity is infinite here. Kids can stick pieces of paper, feathers, glitter, and you can play a video for them to see this magnificent animal that are the Snowy Owl.

Usei um marcador de giz branco para este projeto porque adoro a aparência de branco com papel artesanal, mas você pode usar qualquer marcador que tenha em casa. A criatividade é infinita aqui. As crianças podem colar pedaços de papel, penas, usar glitter e você pode procurar para eles um vídeo para mostrar este animal magnífico que é a coruja-das-neves.

This is more or less what I drew in the cereal box. Go ahead, I know you can do better than this!

Isto foi, mais ou menos o que fiz. Eu sei que você pode fazer melhor que isso. :)

Still with the idea of crafting with Snowy Owls, have a look at another idea here. You will need toilet rolls, markers and opitionaly, feathers and glue. Enjoy it!!! If you want to watch a video of my daughter making an owl by herself, just pop to my Instagram, ‘andreakjanes’ and check one of my Highlights. ;)

Ainda com a idéia de criar Corujas-das-neves, dê uma olhada em outra idéia aqui. Você precisará de rolos de papel higiênico, marcadores e, opcionalmente, penas e cola. Aproveite!!! Se você quiser assistir a um vídeo da minha filha de 6 anos fazendo uma coruja sozinha, basta aparecer no meu Instagram, ‘andreakjanes’ e conferir um dos meus destaques. ;)

Leave a comment

I found in photography a way of giving love and beauty that is only possible because of you. It’s your own love and beauty that hits my camera’s sensor and is recorded for posterity.

Lorena_Cutting Board 2 copy

I’m wishing all my clients, friends and my family who gave me so much love this year, the loveliest Christmas ever. I wouldn’t be what I am if I didn’t have you in my life. In my chaotic, “non professional”, affectionate, “craving creativity” way of life, my biggest motivation is to bring you a bit of the magic I wish I bring to my own family time to time.

Wishing then a year of harmony, lightness, lots of laughs and creativity to all of us.

2020, bring it on!!!!

Leave a comment

Casa de boneca no canal_01b copy

I’ve been wanting to make a dollhouse for my daughter for a long time. Victorian dollhouses are as beautiful as they are expensive. At the same time I did not want anything that take up half of her room, which is already narrow, nor did I want anything that visually made the room look messy.

That’s when I had a vision of a very tall house that I could turn and lean against the wall, hiding the messy little furnitures. Ha! A Dutch Canal (Doll)house!

I searched websites looking at buying one, new or secondhand, but no luck. So I decided to go to Ikea and see if they had any pieces I could use as a base for the dollhouse.

That’s when I found the Eket Unit System. I took my daughter so she could choose her favourite colour. The light blue, she said! Assembly is with one click only. Great!

Screen Shot 2018-11-14 at 12.11.47

I bought three modules of 35 x 35 x 25cm.

Next Stop: a DIY warehouse. I needed to create the front of the house. A 6mm tick plywood board, 131 x 38cm. I bought two pieces, one reserve just in case I made a mistake.

We set up the Eket Unit but left out the back part. These we will use to create the roof.

Casa de boneca no canal_02 copy

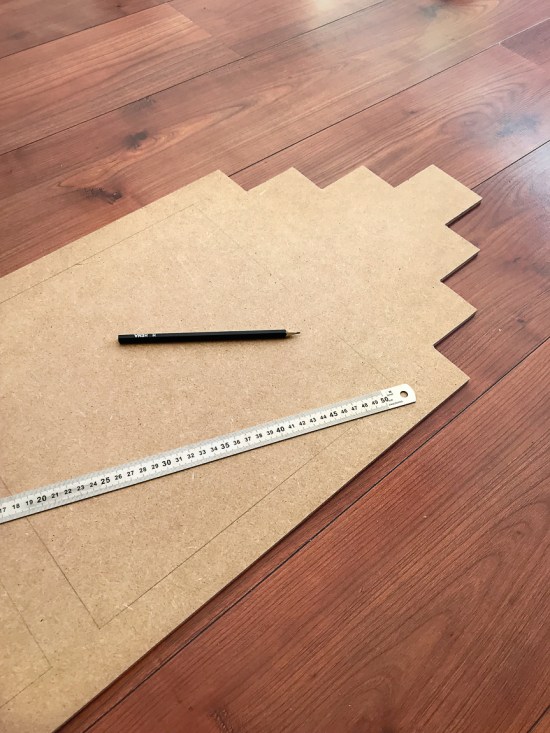
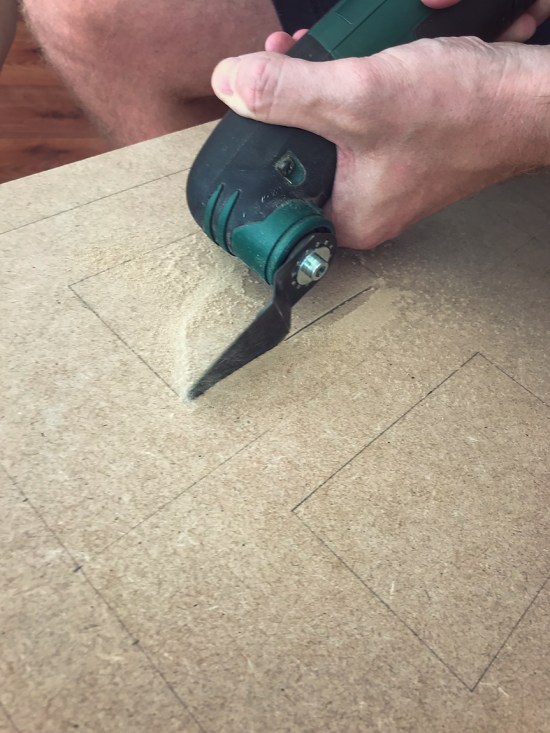
With the plywood board on the floor, I first marked with a rule and pencil the three squares 35 x 35 cm to know the exact position of the three Eket Units. Then I drew the rectangles that are the windows, the door and the silhouette of the roof.

Here is the point where you can create your own design, make a curvy roof, maybe? Six windows?

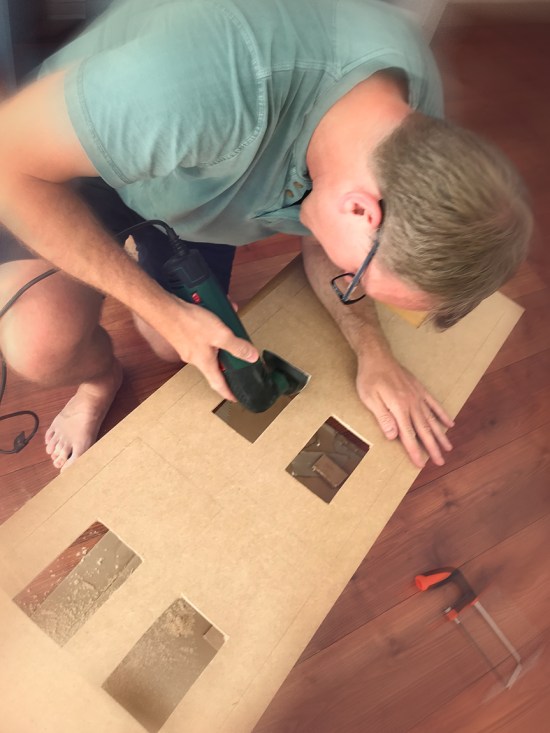
This is where you put your husband to work! Thank you! Let’s cut the wood!

Casa de boneca no canal_03 copy

After that you have to sand the edges, so everything is very smooth.

Casa de boneca no canal_04 copy

Let’s then glue the modules with double-sided tape and wooden glue.

Casa de boneca no canal_05 copy

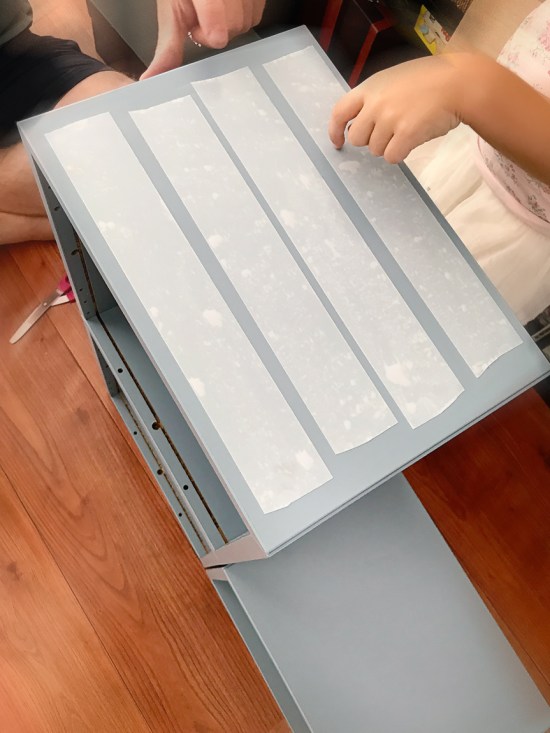
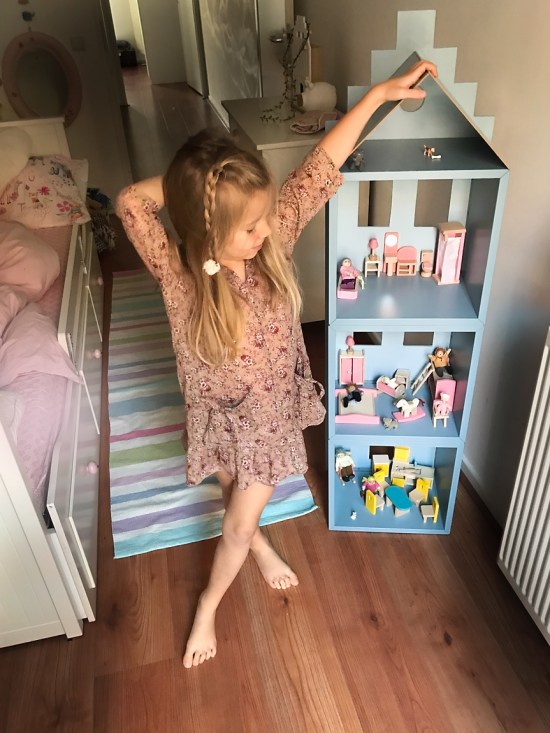
Look at the little house! How exciting is it to see a project taking shape!

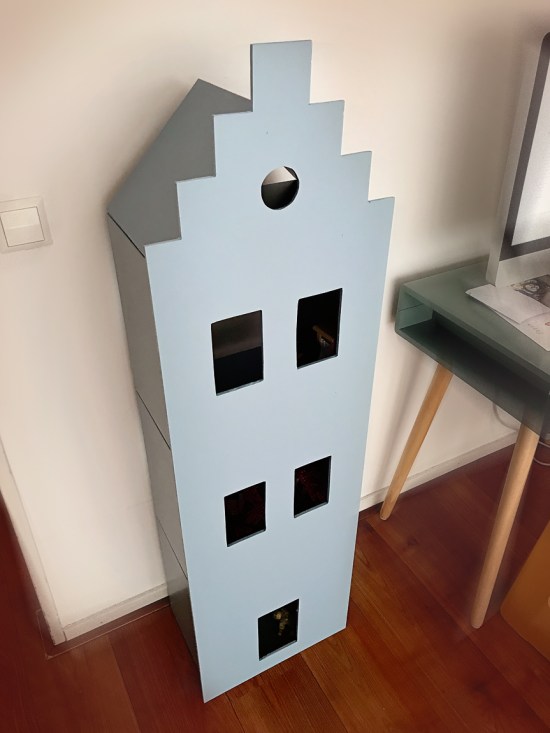
The Rounded window at the top, we did with utility knife because we did not have the right tool for this. It worked well but you need patience. It takes a while.

Casa de boneca no canal_06 copy

In fact, before you glue the front of the house with your EKET Units, you will need to prime and paint it, both sides. I took a piece of the Eket Unit to the DIY Shop to find paint that matches the original colour of the Unit. Luckily they had the right tone of blue without having to customise anything (much cheaper!).

For anyone living in the Netherlands, the one I bought was the water base Grijsblauw 1008 from Flexa. I’m sure other brands will do the same job, so go ahead and find it or choose any other colour you love.

Let’s go back to that part of the Eket Unit (the back wooden sheets) that I said not to use because now we will make the roof of the dollhouse.

Casa de boneca no canal_07 copy

Cut two squares of 24.5 x 24.5 cm.

Lay the house down and glue these two pieces together making a triangular prism shape. If necessary, score objects so that the wooden sheets do not move. Leave it overnight to dry.

Casa de boneca no canal_08 copy

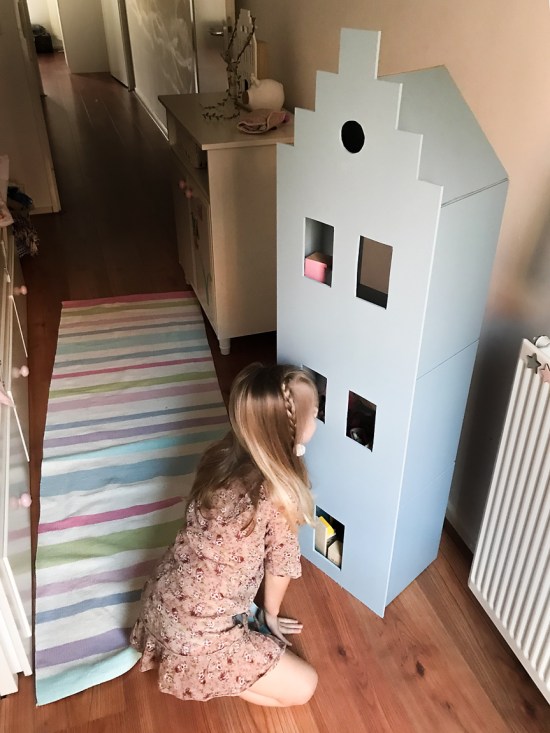
The Dutch Canal Dollhouse is ready to play with!

Casa de boneca no canal_09 copy

And as far as that spare plywood board goes – I’m considering creating a second house, with a different shaped roof, so we can store our kids’ books as well and make the Kids’ room look super cool.

Casa de boneca no canal_10 copy

I hope you like it ! If yeas, leave a comment! ;)

_______________________________________________________________________________________

Em Português: Faz tempo que eu andava querendo fazer uma casa de bonecas para a minha filha. Dollhouses vitorianas são tão lindas quanto caras. Ao mesmo tempo eu não queria algo que ocupasse metade do quarto dela, que já é estreito, nem tão pouco queria algo que visualmente deixasse o quarto com um aspecto bagunçado.

Então cheguei na solução que uma casa vertical, alta, onde eu pudesse virar e encostar na parede, sem que se visse os pequenos móveis, seria a solução. Claro, uma casa típica de canais holandeses!

Por não saber como fazer a casa, eu olhava em sites de segunda mão. Tivemos algumas tentativas de compras frustradas, até o dia em que fui passear no Ikea com a intenção de ver se eles tinham alguma peça que eu poderia usar como base para a casa de bonecas.

Foi quando achei o sistema Eket do IKEA. Levei minha filha para que ela pudesse escolher a cor favorita. Azul claro, disse ela! Ótimo!

Comprei três módulos de 35 x 35 x 25cm.

Agora é hora de ir até a loja de materiais de construção e comprar a frente da casa. Uma placa de madeira compensada de 6mm de espessura. Pedi para que pudessem cortá-la 131 x 38cm. Trouxe duas, caso eu errasse, teria uma para substituir.

Montamos os Sistemas Eket do Ikea mas deixamos de fora a parte de trás. Eles vão servir para fazer o telhado mais para frente.

Aqui é o ponto onde você pode criar seu próprio design, fazer um telhado curvo , talvez? Ou até 6 janelas?

Agora é hora de colocar o marido para trabalhar! Obrigada!

Depois disso temos que lixar as rebarbas de madeira para deixar bem liso.

Vamos então colar os módulos com fita dupla face e cola de madeira.

Antes de colar a frente da casa, você precisará passar um primer e pintar. Eu levei um pedaço do Módulo Eket na loja de materiais de construção para conseguir o ton mais próximo dele. Eu tive sorte de achar uma tinta sem precisar mandar fazer uma mistura e assim pagar mais caro.

Se for relevante para quem vive na Holanda como eu, a tinta que comprei foi a Grijsblauw 1008  from Flexa. Tenho certeza que outras marcas farão o mesmo trabalho, então é só procurar!

Vamos voltar para aquela parte do Sistema Eket que eu deixei separado. Agora vamos fazer o telhado.

Corte então dois quadrados de 24,5 x 24,5 cm.

Deite a casa e cole essas duas partes com cola forte, fazendo um triangulo. Se precisar, coloque alguns objetos em volta para escorar as placas de madeira, para que elas não se movam. Deixe a noite inteira secando.

A casa está pronta para brincar.

Antes de finalizar, lembram daquela placa de madeira compensada que eu tenho sobrando? Ela ainda pore ser usada para fazer uma segunda casinha, com o formato do telhado diferente e assim acharmos espaço para guardar livros e fazer o quarto infantil ficar ainda mais charmoso. ;)
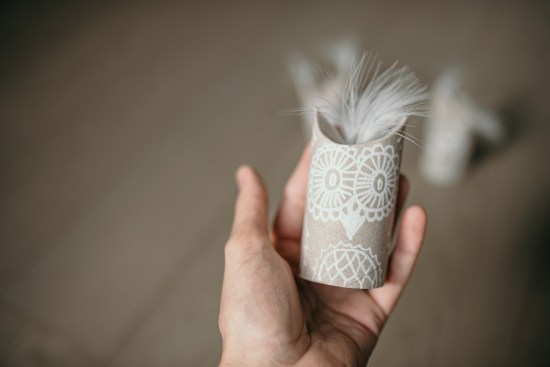
 

Leave a comment

This is the “kinder Boeken Week 2018” here in the Netherlands. This means that it’s kind of the same thing as the Book Day we experienced in England.

That’s so cool because it’s not purely dressing up, but it must be a Book Character that the kids like and relate to.

This is what we came with this year. :)

I hope you like it!

Leave a comment

This project could be a perfection from the start to the end, but it’s not. I’d say that if I was going to sew these butterfly wings again, I’d do it a bit different but somehow it came up cute and someone here is having lots of fun.

First I used some pieces of fabrics that I brought from Brazil. The idea of making wings was there, stored in a folder in the bottom of a drawer somewhere called Pinterest. I saw different styles and could figure out how to make it. Well, more or less.

Buttefly-Wings_14

First I drew half of a wing on a large paper (wrap paper works wonderfully) . I cut the cloths and sewed the middle part of each one together.

Buttefly Wings_01

I pinned the fabric facing each other together and sewed almost all the way, leaving only the bottom part opened, so then I could turn and fill it with the batting (foam for padding).

Buttefly Wings_02Buttefly Wings_03

This is how it looks after turning.
Then I ironed the wings. (This step is necessary, believe me.)

Buttefly Wings_04

I had some wire at home, and this is the part that I would have done differently, buying a thicker one. The wire makes the wings to hold up.

Then I calculated and bent the wire until it was more or less in the required position and format. I bent also the ends (see picture) so it would not stick the fabric later.

Buttefly Wings_05Buttefly Wings_06

I cut the wadding that I had at home the same size as my previews drawings, using it doubled to be ticker. I placed them inside the wings.

Buttefly Wings_07Buttefly Wings_08

I sewed again around all the edges, one centimeter to inside for the wire to pass around.

I drew in a piece of A4 paper some forms. Sewing those forms gives nice details to the wings, at the same time making the batting to be in place. You might require a bit of familiarity with free motion quilting, but as I don’t have it, I sewed very, very slowly. Haha

Buttefly Wings_09

The last step now is to sew the elastics. In this case I covered them with fabric but a simple elastic will be fine and cute too. I had to try it many times while sewing to get it right and don’t get so tight or so loose on my daughter’s shoulders.

Buttefly Wings_10

The fine wire made these wings very soft, and I even see a charm in it, but maybe it’s wiser to put a thicker one if you don’t want to be smoothing out the wire after every play.

The size of the wings depends a lot on the size of the child. The nice thing about this project is that you can play with size, format, types of fabrics and padding, thickness of wire… and it will give a totally different look to the wings. Enjoy it. :)

Buttefly-Wings_11Buttefly-Wings_12Buttefly-Wings_12bButtefly-Wings_13Buttefly-Wings_15Buttefly-Wings_16Buttefly-Wings_17

For those who wonder, the crochet doll was made by my mom. We loved so much this “doll experiment”,  that we asked to bring it all the way from Brazil to here. So it stays like this; bald, no eyes, no mouth or clothing. :)

Buttefly-Wings_14

Leave a comment

When your almost 4 years old daughter can’t still start Kindergarten, mom has to be creative somehow. With some pieces of old cartoon boxes, some paint and fabric, we created puppets. It turns out being the toys I love the most. :)

Marionette_Big_01-copyMarionette_Big_02-copyMarionette_Big_03-copyMarionette_Big_04-copy

Leave a comment

We’ve been to this miniature park, Madurodam. The 1:25 scale replicas of famous Dutch landmarks are wonderful and it’s quite impressive to think that the park is already 65 years old. It was restored in 2011 to celebrate its 60th birthday.

Madurodam was named after George Maduro, a jewish law student from Curaçao who fought the Nazi occupation forces. He died in 1945 at Dachau concentration camp.

Estivemos no parque Madurodam, onde há réplicas de vários monumentos holandeses na escala de 1:25. O parque foi renovado em 2011 para celebrar seu 60 anos.

O nome Madurodam vem em homenagem a George Maduro, um estudante de direito judeu de Curaçao que lutou contra os nazistas pela Holanda e morreu em 1945 no campo de concentração de Dachau.

Madurodam_01-copyMadurodam_02-copyMadurodam_03-copyMadurodam_04-copyMadurodam_05-copyMadurodam_05b-copyMadurodam_06-copyMadurodam_07-copyMadurodam_08-copyMadurodam_09-copyMadurodam_10-copyMadurodam_11-copyMadurodam_12-copyMadurodam_13-copyMadurodam_15-copyMadurodam_16-copyMadurodam_17-copy

Leave a comment

When you think about a park with more than 7 million tulips, (more than 800 varieties of it) and other varieties of gerberas, daffodils and roses, this is the place. It’s only open seven weeks a year. It’s beautiful, it’s colourful.

Quando você pensa num parque com mais de 7 milhões de tulipas, (mais de 800 espécies) e ainda outras variedades como gérberas, narcisos e rosas, este é o lugar. Aberto somente 7 semanas no ano, o parque é lindo e colorido.

Keukenhof_05-copyKeukenhof_06-copyKeukenhof_07-copyKeukenhof_08-copyKeukenhof_09-copyKeukenhof_10-copyKeukenhof_11-copyKeukenhof_01-copyKeukenhof_02-copyKeukenhof_03-copyKeukenhof_04-copyKeukenhof_12-copyKeukenhof_13-copyKeukenhof_14-copyKeukenhof_15-copyKeukenhof_16-copyKeukenhof_17-copyKeukenhof_18-copyKeukenhof_19-copyKeukenhof_20-copyKeukenhof_43-copyKeukenhof_21-copyKeukenhof_22-copyKeukenhof_23-copyKeukenhof_24-copyKeukenhof_25-copyKeukenhof_26-copyKeukenhof_27-copyKeukenhof_28-copyKeukenhof_29-copyKeukenhof_30-copyKeukenhof_31-copyKeukenhof_32-copyKeukenhof_33-copyKeukenhof_34-copyKeukenhof_35-copyKeukenhof_36-copyKeukenhof_37-copyKeukenhof_38-copyKeukenhof_39-copyKeukenhof_40-copyKeukenhof_41-copyKeukenhof_42-copy

Leave a comment